
I’ve got a really fun trick I picked up in my travels. It’s for using super bulky yarns to warp a floor loom!! It’s quick and uses just a few easy to pick up essentials that will help you create your own textured bulky warps!!
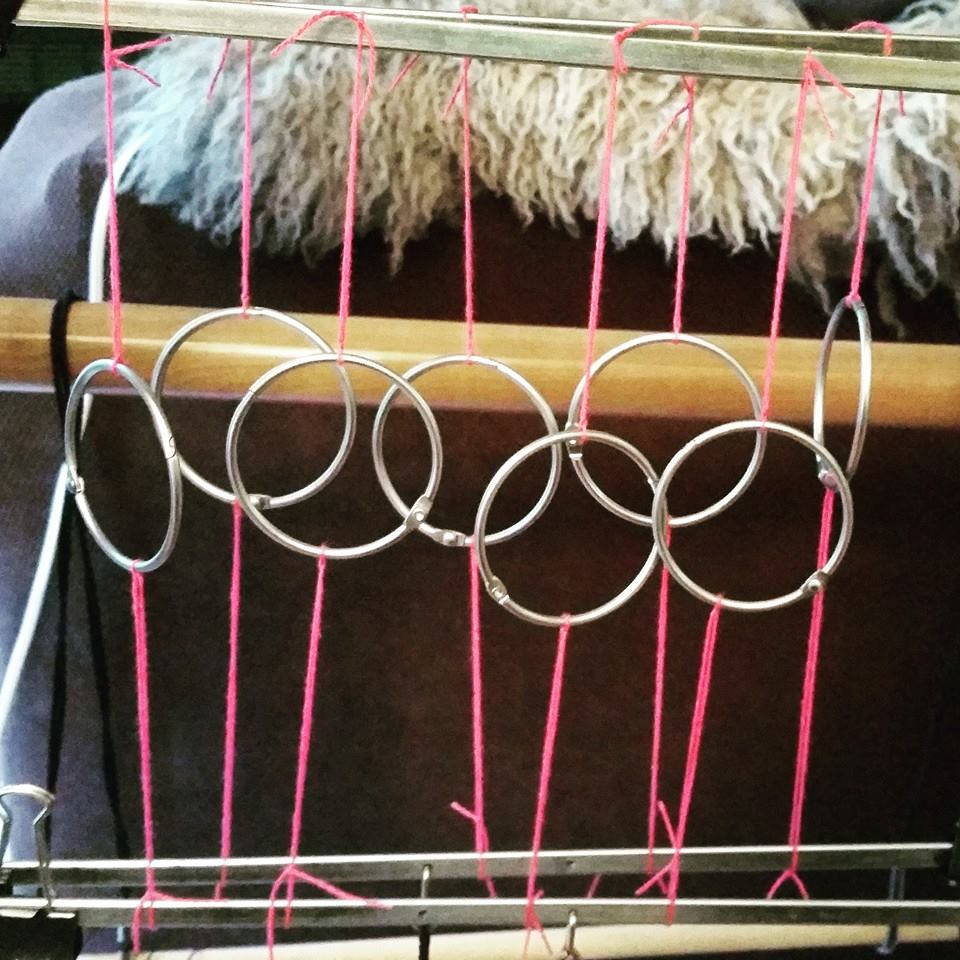
Direct warping is a quick way to warp a loom when you aren’t planning on a long or wide warp. Direct warping is standard for rigid heddle looms, but not often used on floor looms, however it’s a great technique for utilizing bulky yarns!! For this trick, you need shower curtain or large key rings, string, clothes pins or binder clips, poster board and scissors. Cut lengths of string (2 for each shower ring) and tie them onto each ring. Once you have your rings tied, move to your loom.
 Split your heddles down the middle and push them to the sides. Clip them back with your clips.
Then tie your new shower ring heddles onto your harness, alternating each one. (You can also keep some of your heddles free and alternate groupings of your standard heddles with your shower ring heddles. This will allow you to alter your warping yarns for different textures.)
This technique works best if you can tie your shower rings with good tension, so it lifts the bulky yarn.
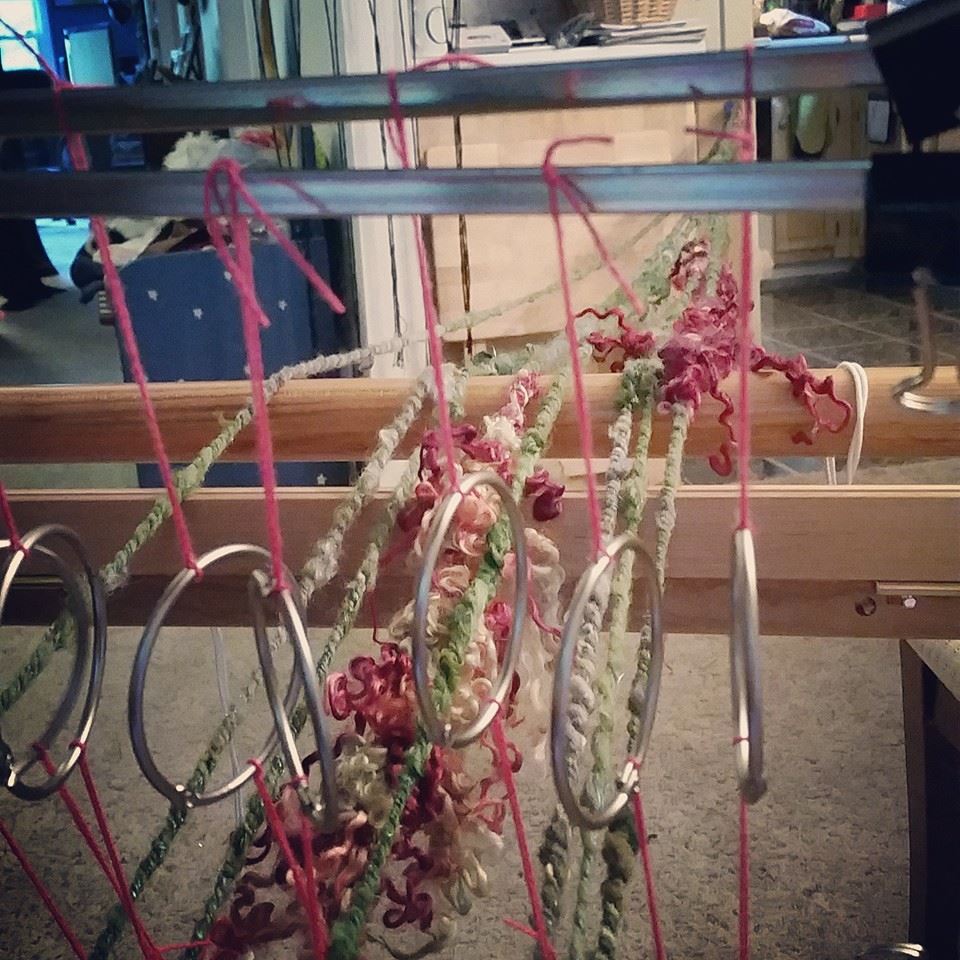 Once your rings are tied onto the harnesses You can begin warping. Secure the tie rod to the back of the loom and tie your yarn on. Then begin to walk your warp to a fixed location, while winding around your back beam that’s on the loom. The fixed location should have a peg or something to hook the yarn to each time you walk back. The key is keeping the tension as similar as possible, though for bulky yarns and different weight yarns, you’ll need to wind on with a separator to keep tension. Each time you wind yarn on, move through the next set of your heddles.
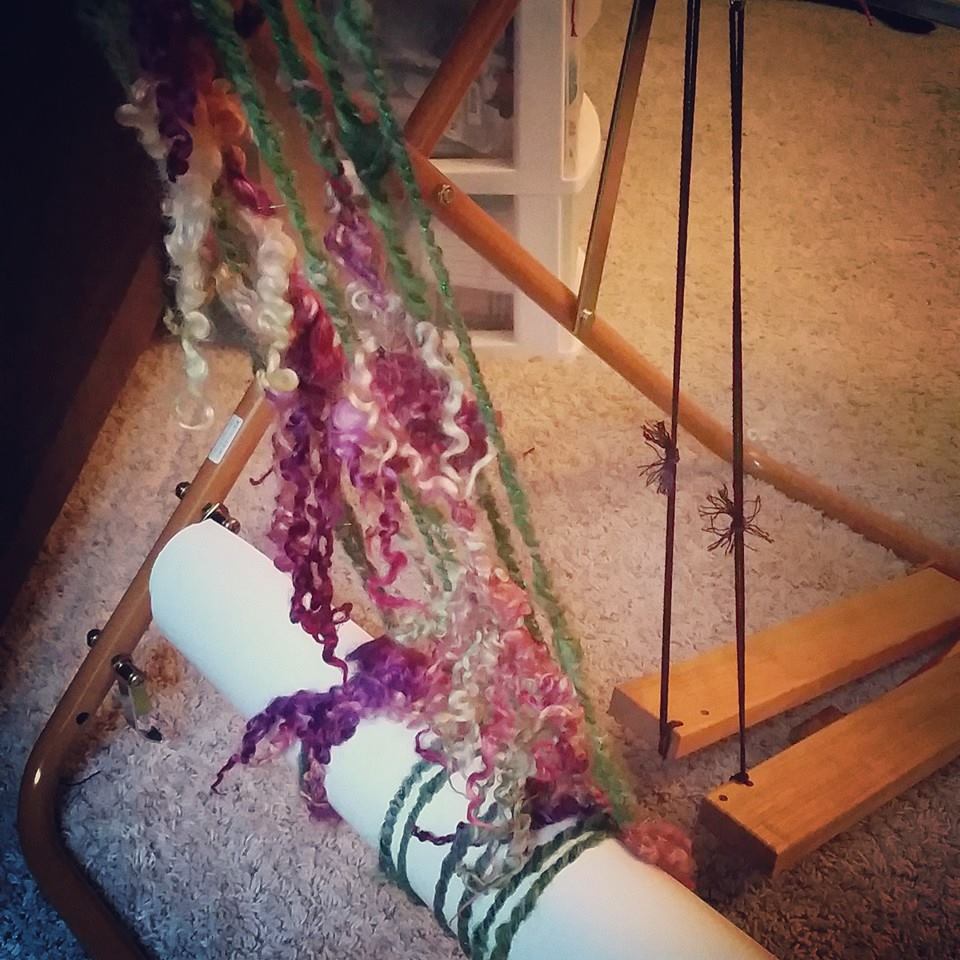
Once you get your yarns walked out, cut them at the fixed location and do a loose crochet chain back to your loom. Then, wind your warp onto the beam with as even tension as possible. Use pieces of poster board in between winding- this will keep the tension even between yarn of different weight and big textures.
After the warp is beamed, thread the yarns through the heddles, alternating between each harness.. Tie onto your front beam as you go to keep order to your threads. It’s not important if you have crosses behind the harnesses, but you want to keep order in your weaving space.
 Once you are tied onto your front beam with tension you are ready to weave! Your shower curtain rings are now the eyes for DIY heddles. They will create the shed in your weaving. Since you don’t have a reed or beater, you can use your shuttle to beat your weft yarns. I prefer to use my fingers to create an open look. You can also use a ruler or other supplemental beaters.
This shower curtain ring trick works for lots of things. You can use it for a bulky supplemental warp thread, and have it travel over your regular reed/beater. Or your can use your comb reed if you have a SAORI loom and bring in the shower curtain ring heddle here and there for a few bulky strands.
So that’s how I’ve DIY’d my own heddles to use my super bulky art yarns in my warps!! Do you have any tricks you use to create more texture in your weaving?